You will need to calibrate your controls in order for them to work properly.
How to calibrate your Controller for Windows You will need to Calibrate the controller for it to work proper and have the correct range of motion. Calibrate the controller When you perform a calibration, you set the range of motion for the axes of the controller. To calibrate the Controller for Windows, plug your controller into one of your computer’s USB ports and follow these steps.
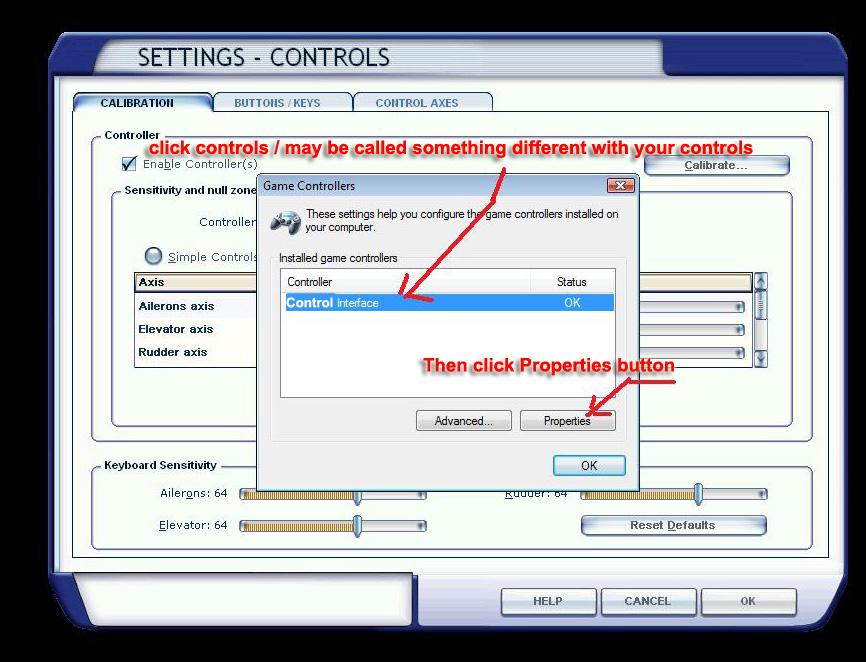
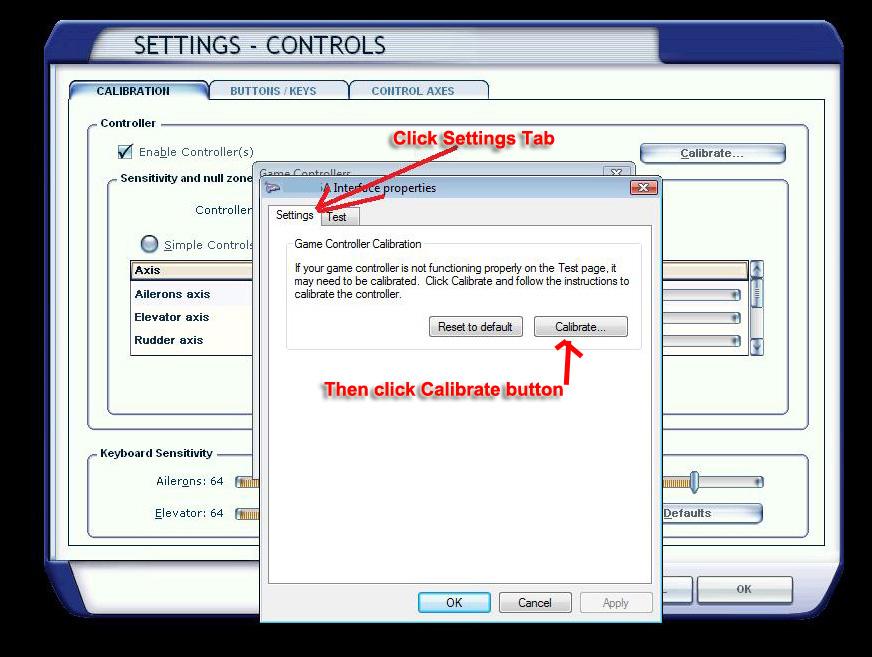
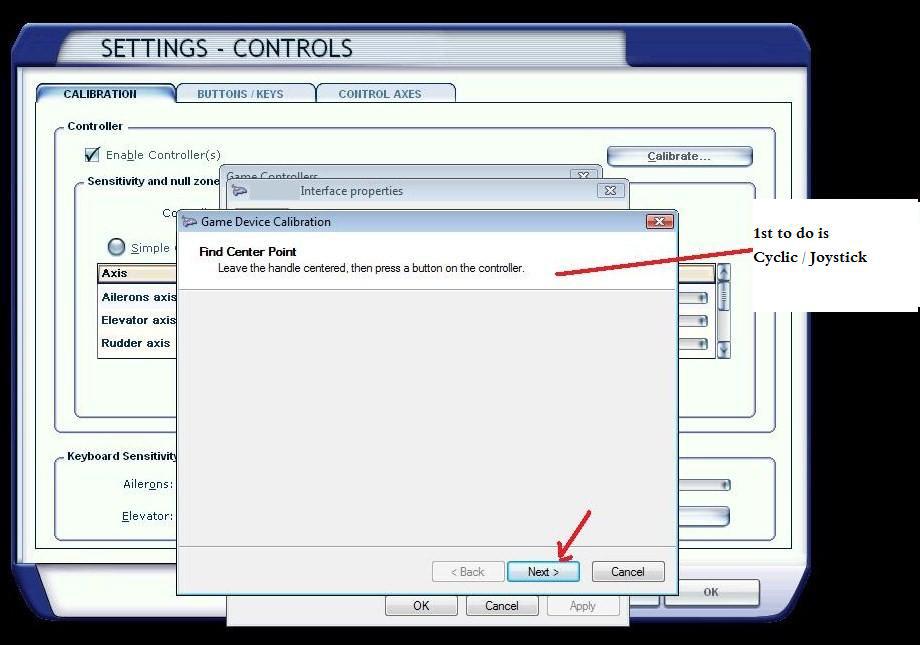
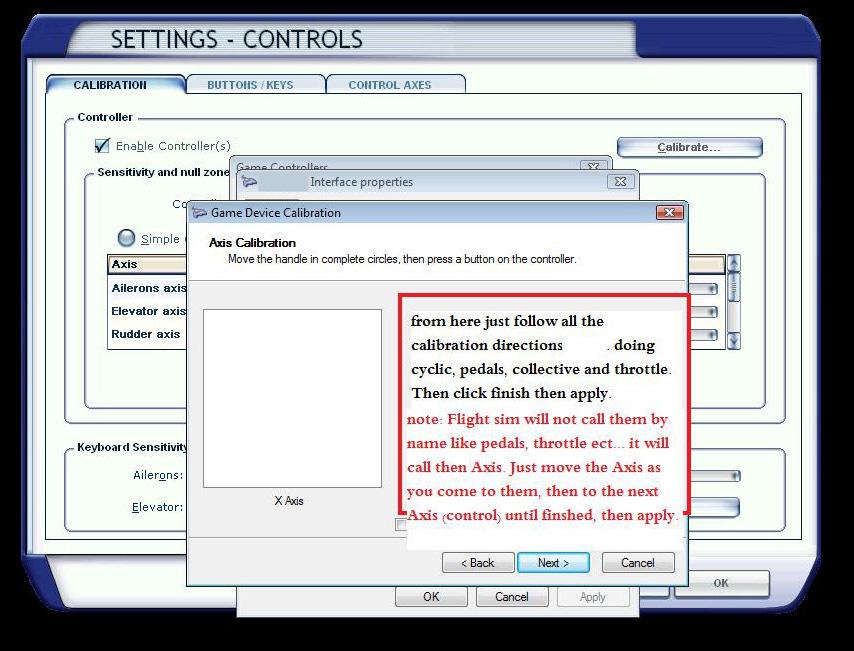
Open the Game Controllers window: In Windows 10, type joy.cpl in the Search box, and then select the joy.cpl result to bring up the Game Controllers window. In Windows 8.1, swipe in from the right edge of the screen, and then select Search. Type joy.cpl, and then select Game Controllers in the search results. In Windows 7, select Start. In the Search programs and files box, type joy.cpl, and then select the Game Controllers icon when it appears. In the Game Controllers window, select the game controller, and then select Properties. Select the Settings tab, and then select Calibrate. Follow the steps in the Device Calibration Wizard. To save the new calibration settings, select Finish, and then select Apply. If you are using Xplane, you will also need to Calibrate and assign the controls in Xplane software
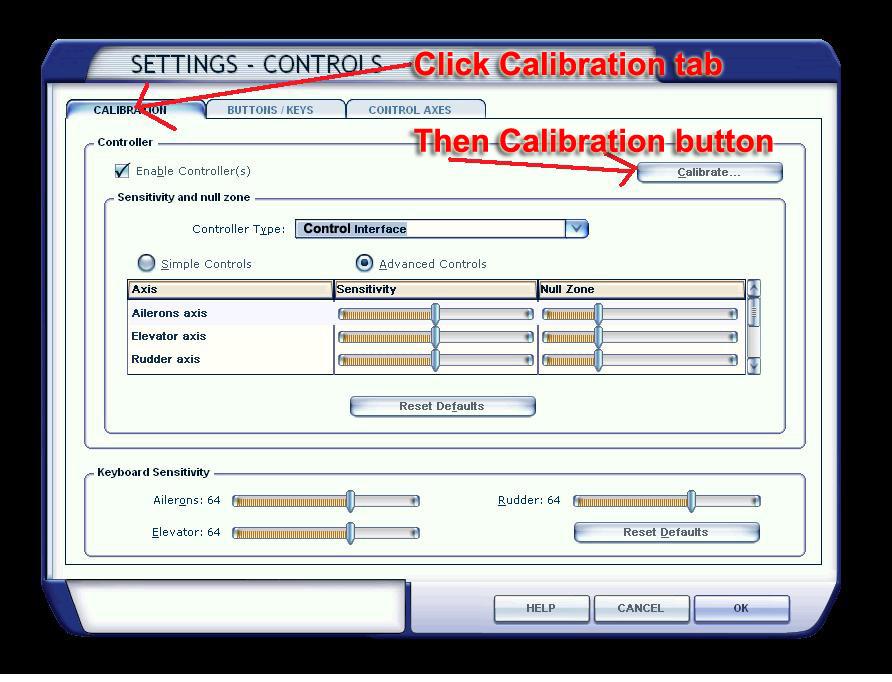
Calibration of simulator controls in Microsoft Flight Simulator X